Building an 8bit ALU using 74LS and 74HCT logic chips
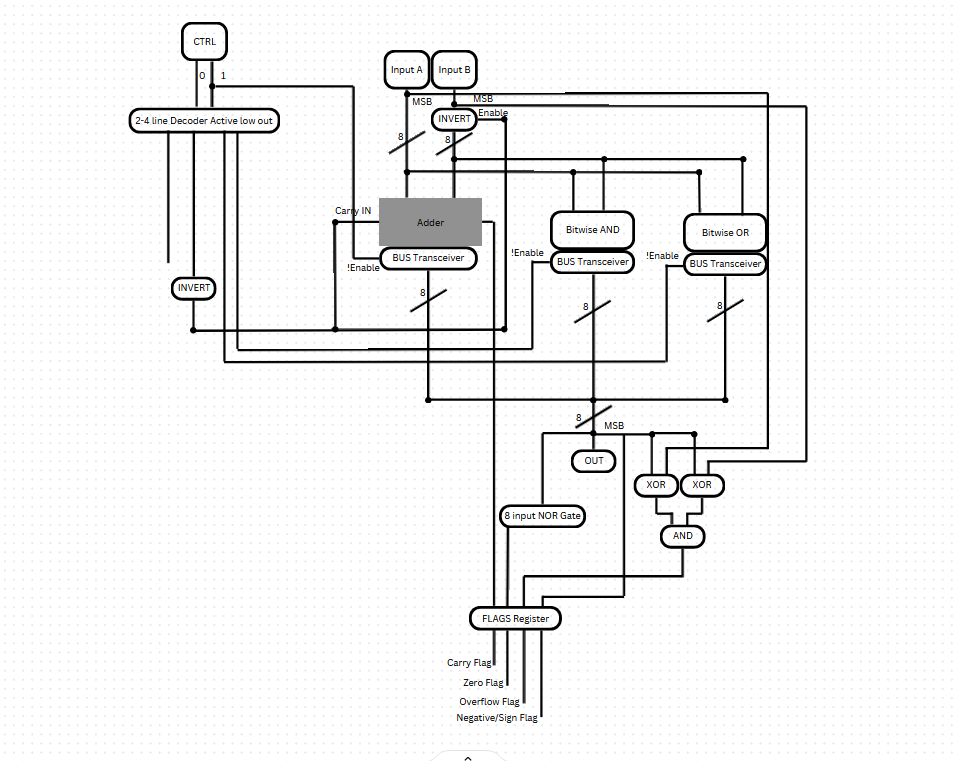
For my highschool senior year project I decided to build and design an ALU I worked with Dr. Stoytchev a computer engineering professer at Iowa State University where I am going to college. I did the main design work in Logisim and Canva, and then built the ALU on a few breadboards. I started by making a Block Diagram of the ALU using canva so I could lay out the control scheme and get an idea of the scale and complexity of the project. It also allowed me to understand how I wanted to lay out all of the busses and how I would control the different modes of the ALU.
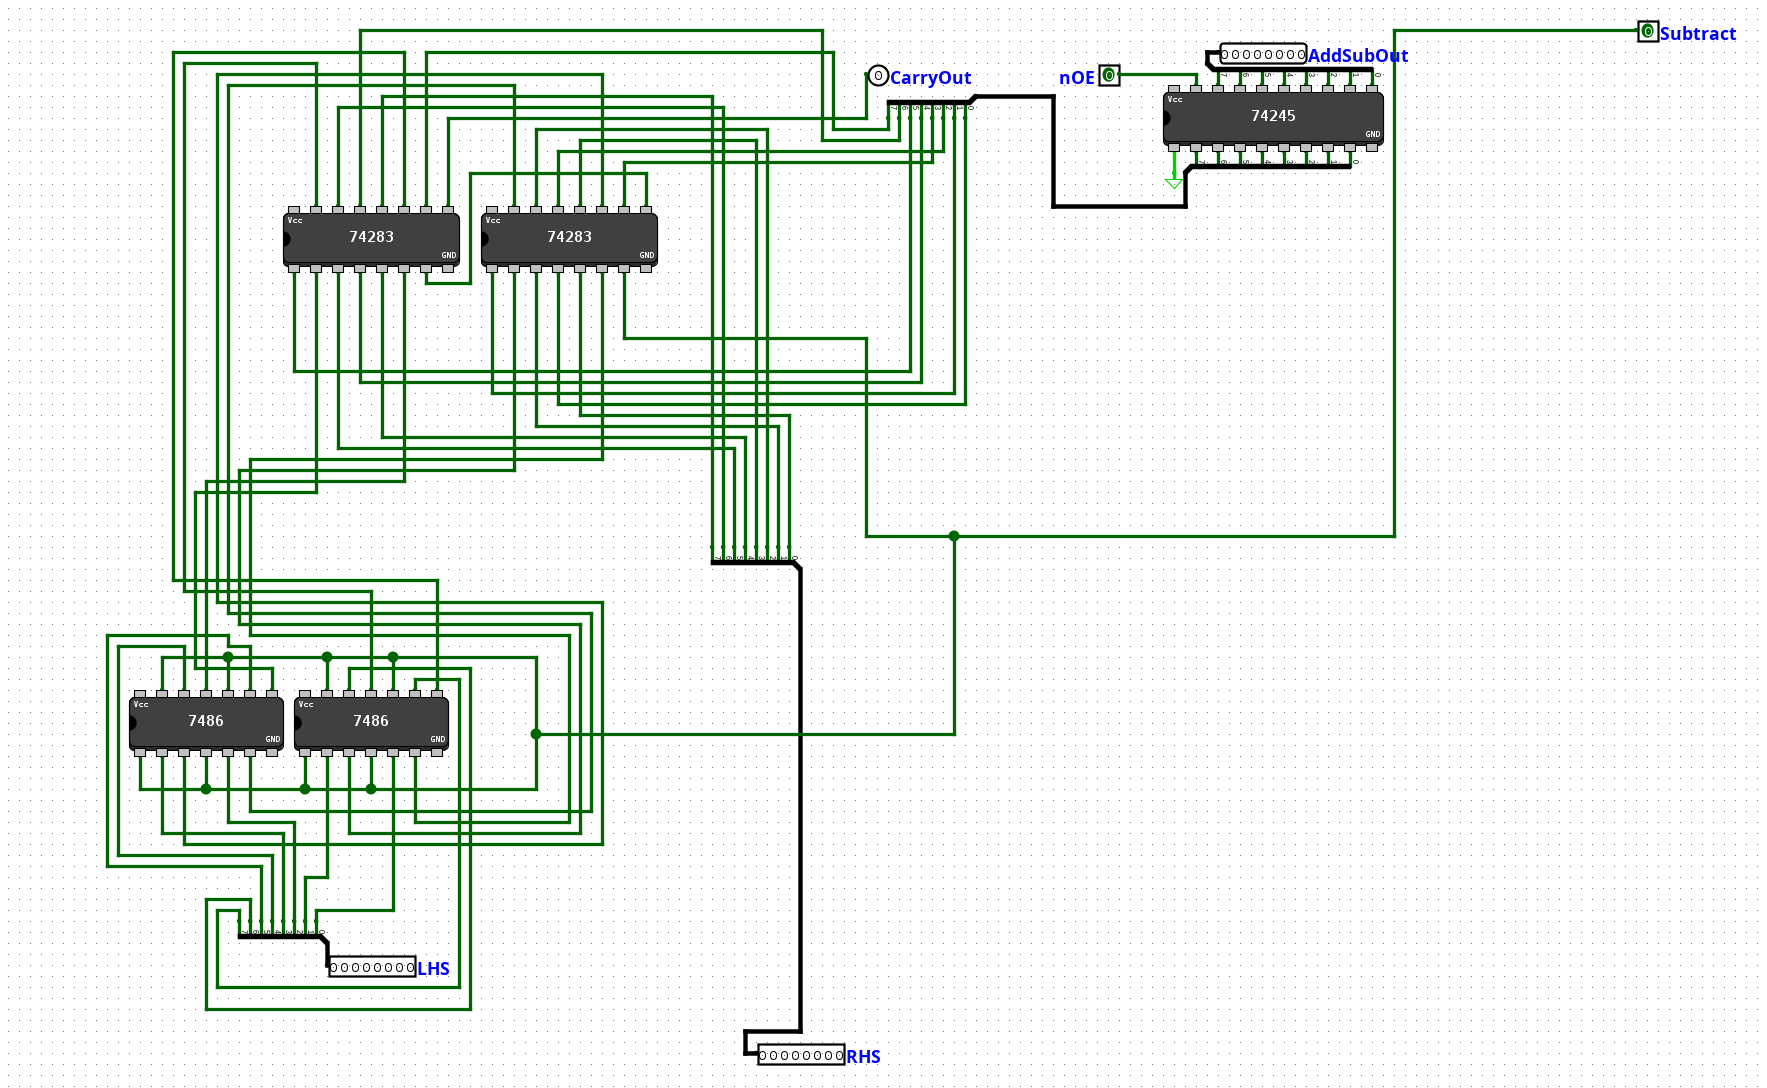
 I next started desiging in Logisim which allows me to fully simulate the ALU and test my control circuts. I started by designing the adder/subtracter Circut which I used 5 chips for including the bus tranciver. Two 7486 chips to invert and generate the twos complement version of one of the numbers to allow for subraction. Two 74283 adder chips to do the additon and subtraction. Finally one 74245 to allow for access to the main output bus.
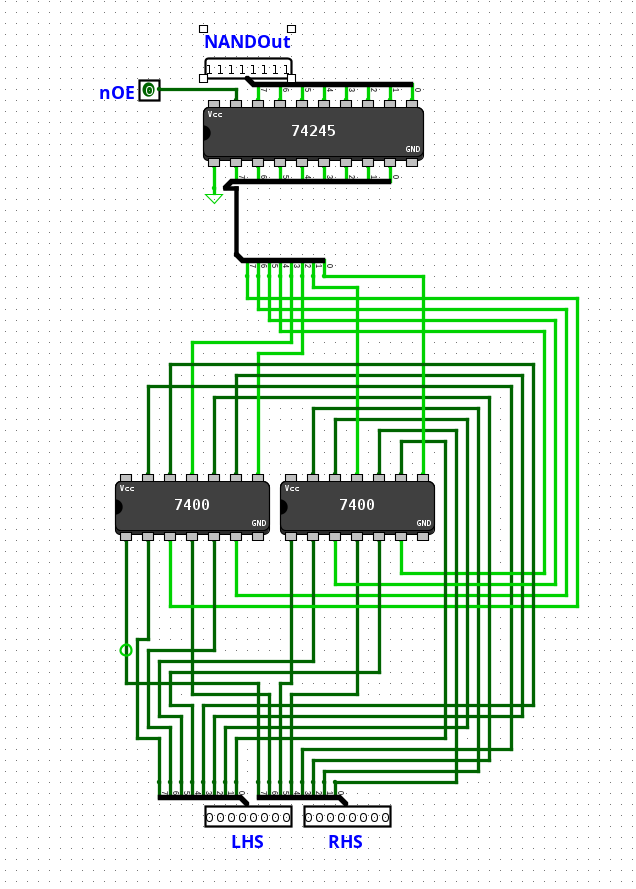
 I then designed the NAND module which would allow for any logic operations to be done by doing multiple operations on the same numbers. This module used three chips including the bus tranciver. I used two 7400 chips which have 4 NAND gates each. I used one 74245 to allow access to the main bus. This one is fairly simple and can be adapted to a different logic gate very easily.
 Next I designed the Bit Shift circut which consisted of multiplexers hooked up in a specific way. I used 74245s for bus access again.